Vector 4 Keyboard Adapter
I was working on an MFM decoder for PulseView to help find bugs I introduced in FlashFloppy. That was working pretty well, but I needed some help keeping count of the current track. Using the Counter decoder on STP signal (step pulse) was pretty close to what I needed, but it wasn’t quite good enough. So I read through all the decoders. And I came across UART.
UART. Wait… Earlier when I was investigating emulating a Vector 4 keyboard I knew from past experience the signal looked pretty similar to serial (RS-232), but it wasn’t quite the same so I thought it’d be a pain to figure out how to configure some hardware appropriately. “Bit banging will be so easy!” (And then it wasn’t; but it was fun.) I hadn’t considered whether it might just be a plain UART. A quick look on Wikipedia confirms, it is totally a plain, ordinary UART.
I plug a USB to UART TTL adapter into my computer and attach the UART to the
keyboard port, fire up miniterm.py /dev/ttyUSB0 300 and… it just
works. Dang, that means it is also trivial to use the UART on the Raspberry Pi
or the
UART on Raspberry Pi Pico with Micropython
or a stm32f1 Blue Pill.
In retrospect, it should have been obvious. The Vector 4 User’s Manual even says as much:
Let’s make an adapter
My real goal is to use a modern keyboard with the Vector 4. I can already do that with USB UART and miniterm, but that requires my computer. It’d be easy to use a Raspberry Pi Zero instead, but it is an overkill and would need to boot each power-on. A microcontroller is ideal if it is easy.
There’s two options for reading from a “modern” keyboard: PS/2 and USB. PS/2 has separate data and clock and doesn’t look too bad, although it is 5V. USB requires USB host support, so the Blue Pill wouldn’t work but the Pico would work with USB On-The-Go. And I already have an adapter cable.
Some searching and I find TinyUSB has a keyboard example. And the example outputs to a terminal via a UART! All I need to do is disable some debug printfs and swap to 300 baud, and build for the Raspberry Pi Pico.
tar xf tinyusb-0.11.0.tar.gz
vim hw/bsp/board.h # change CFG_BOARD_UART_BAUDRATE to 300
cd examples/host/cdc_msc_hid
vim src/hid_app.c src/main.c # disable printfs
mkdir build
cmake -DFAMILY=rp2040 -DBOARD=raspberry_pi_pico .. # Seems fine without -DBOARD
make -j
# copy cdc_msc_hid.uf2 to Pico
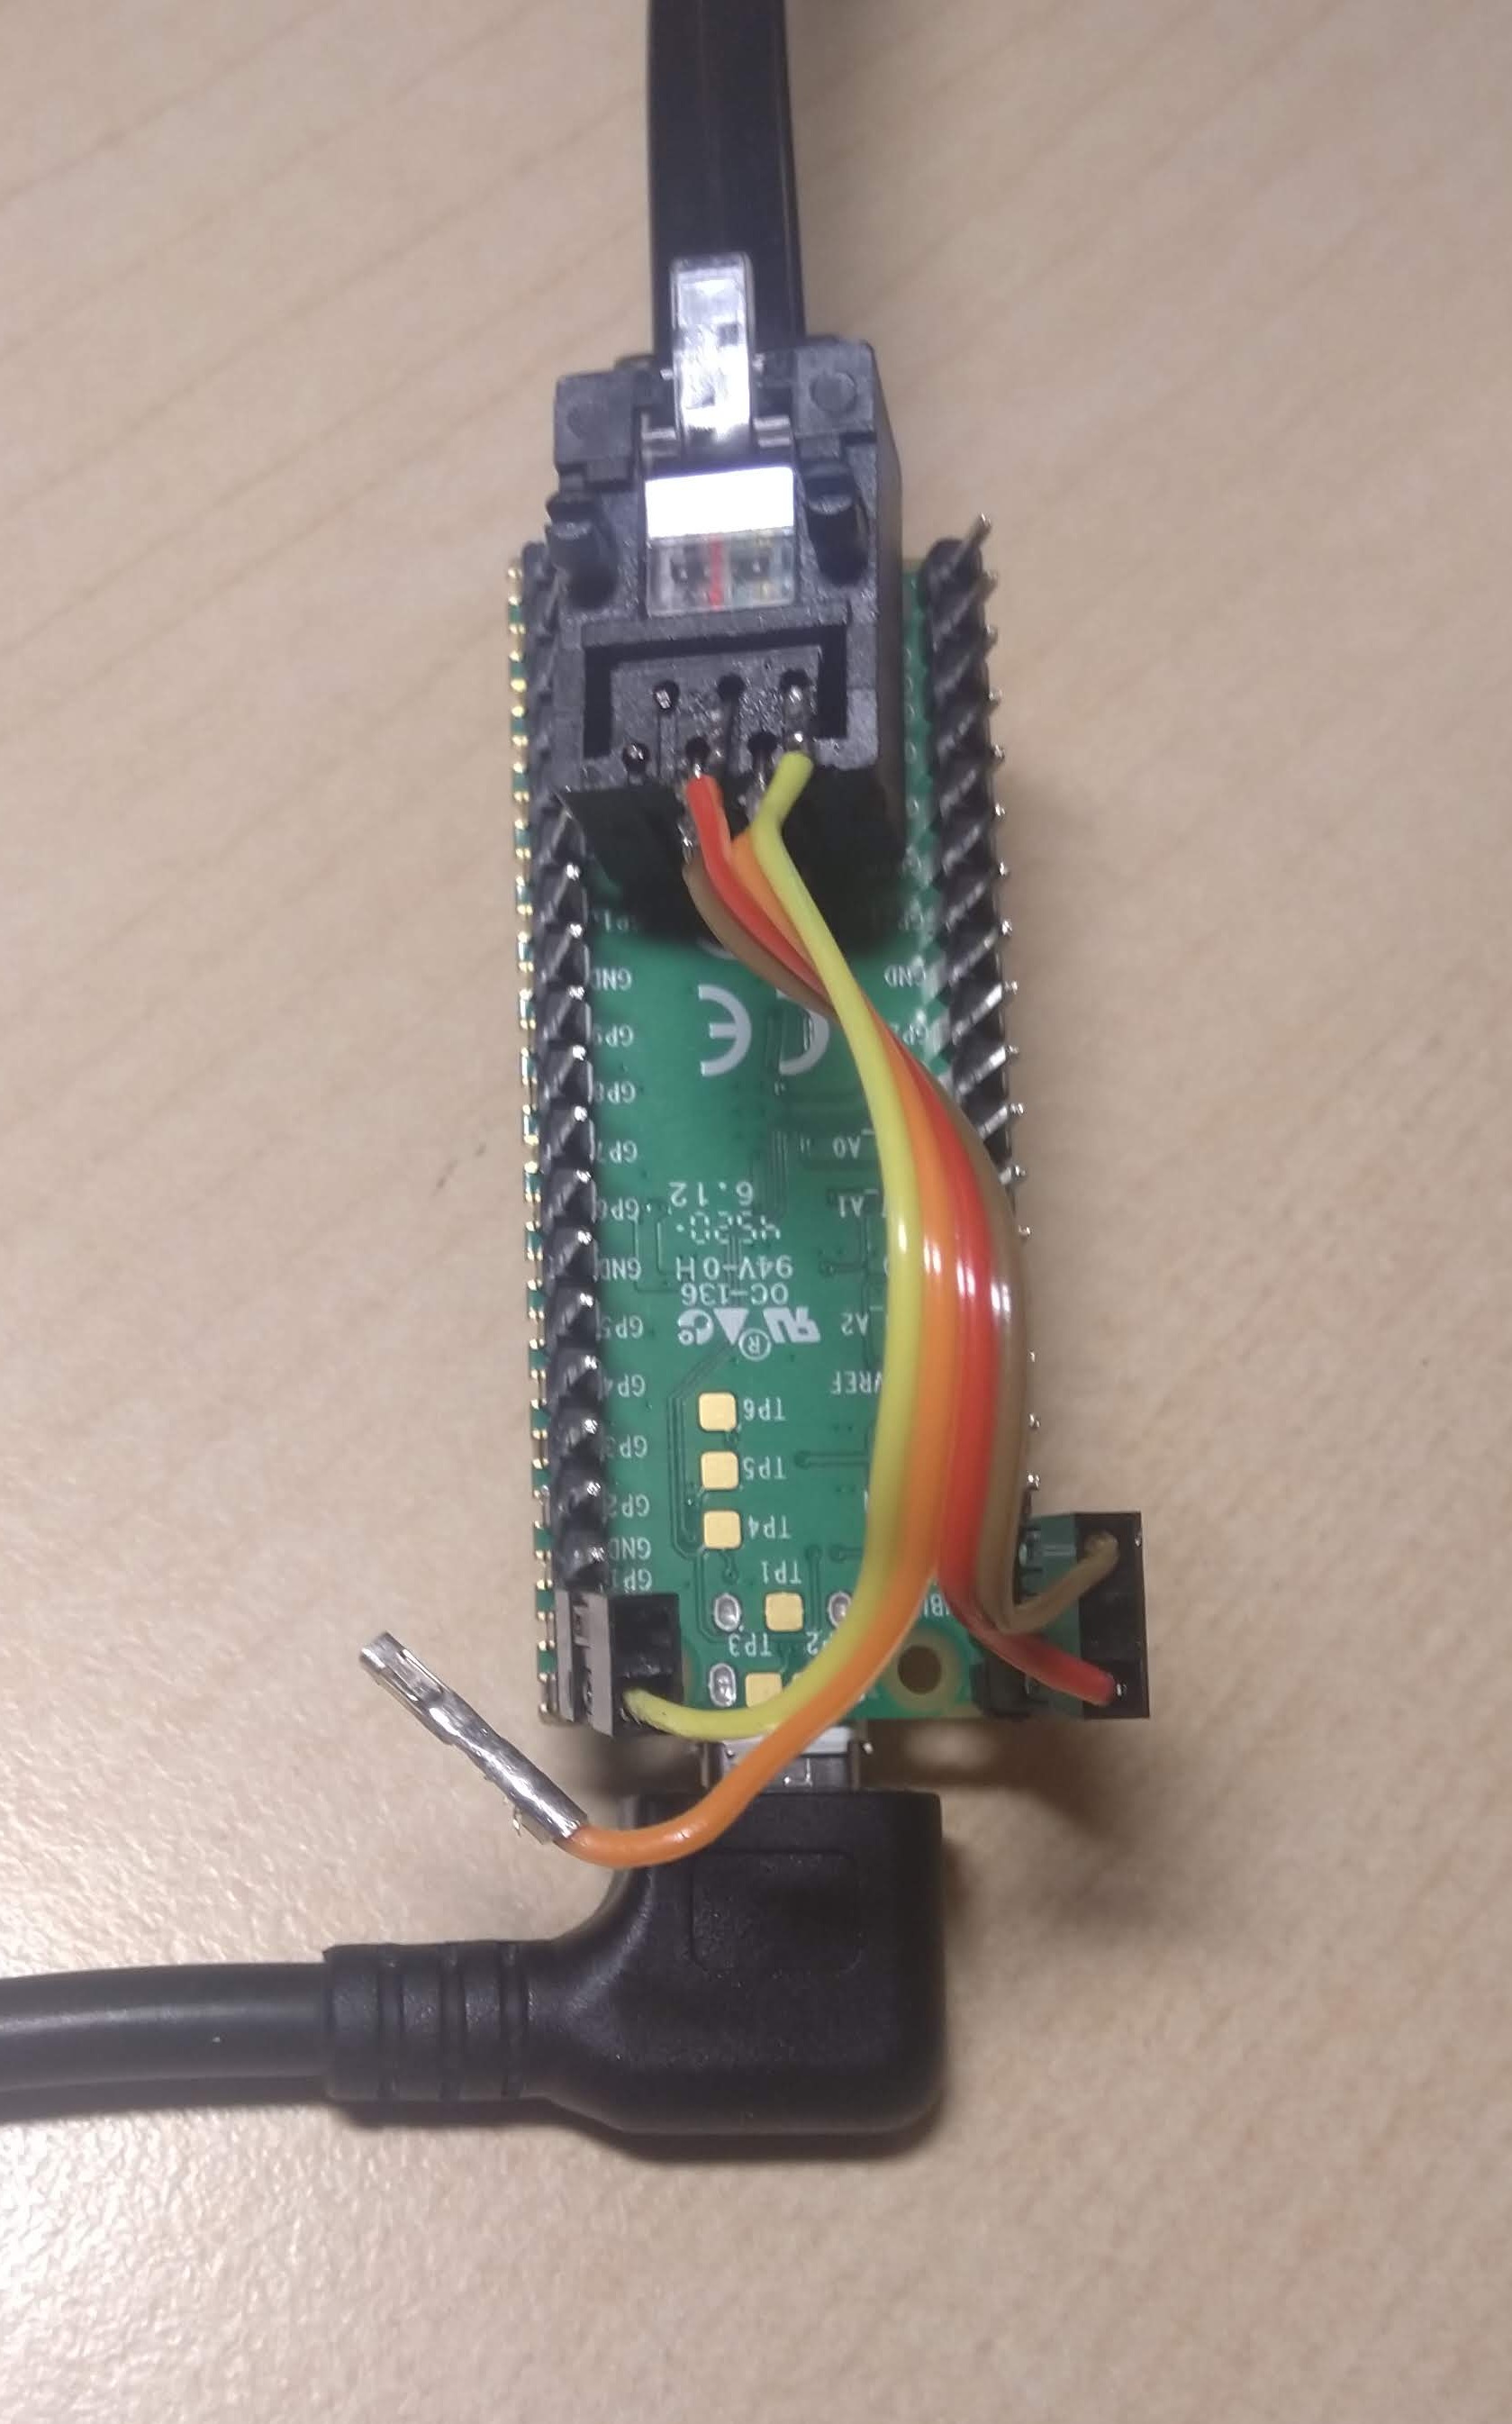
The logic analyzer confirms it is working, so now I need a physical adapter. I grab a 6P6C mount I happen to have, solder wires directly to it, and attach it to the Pico. The Vector provides 5V, which is perfect for using USB OTG and powering the Pico. (Power+ground on the right. TX on the left, with RX floating because it is 5V.)
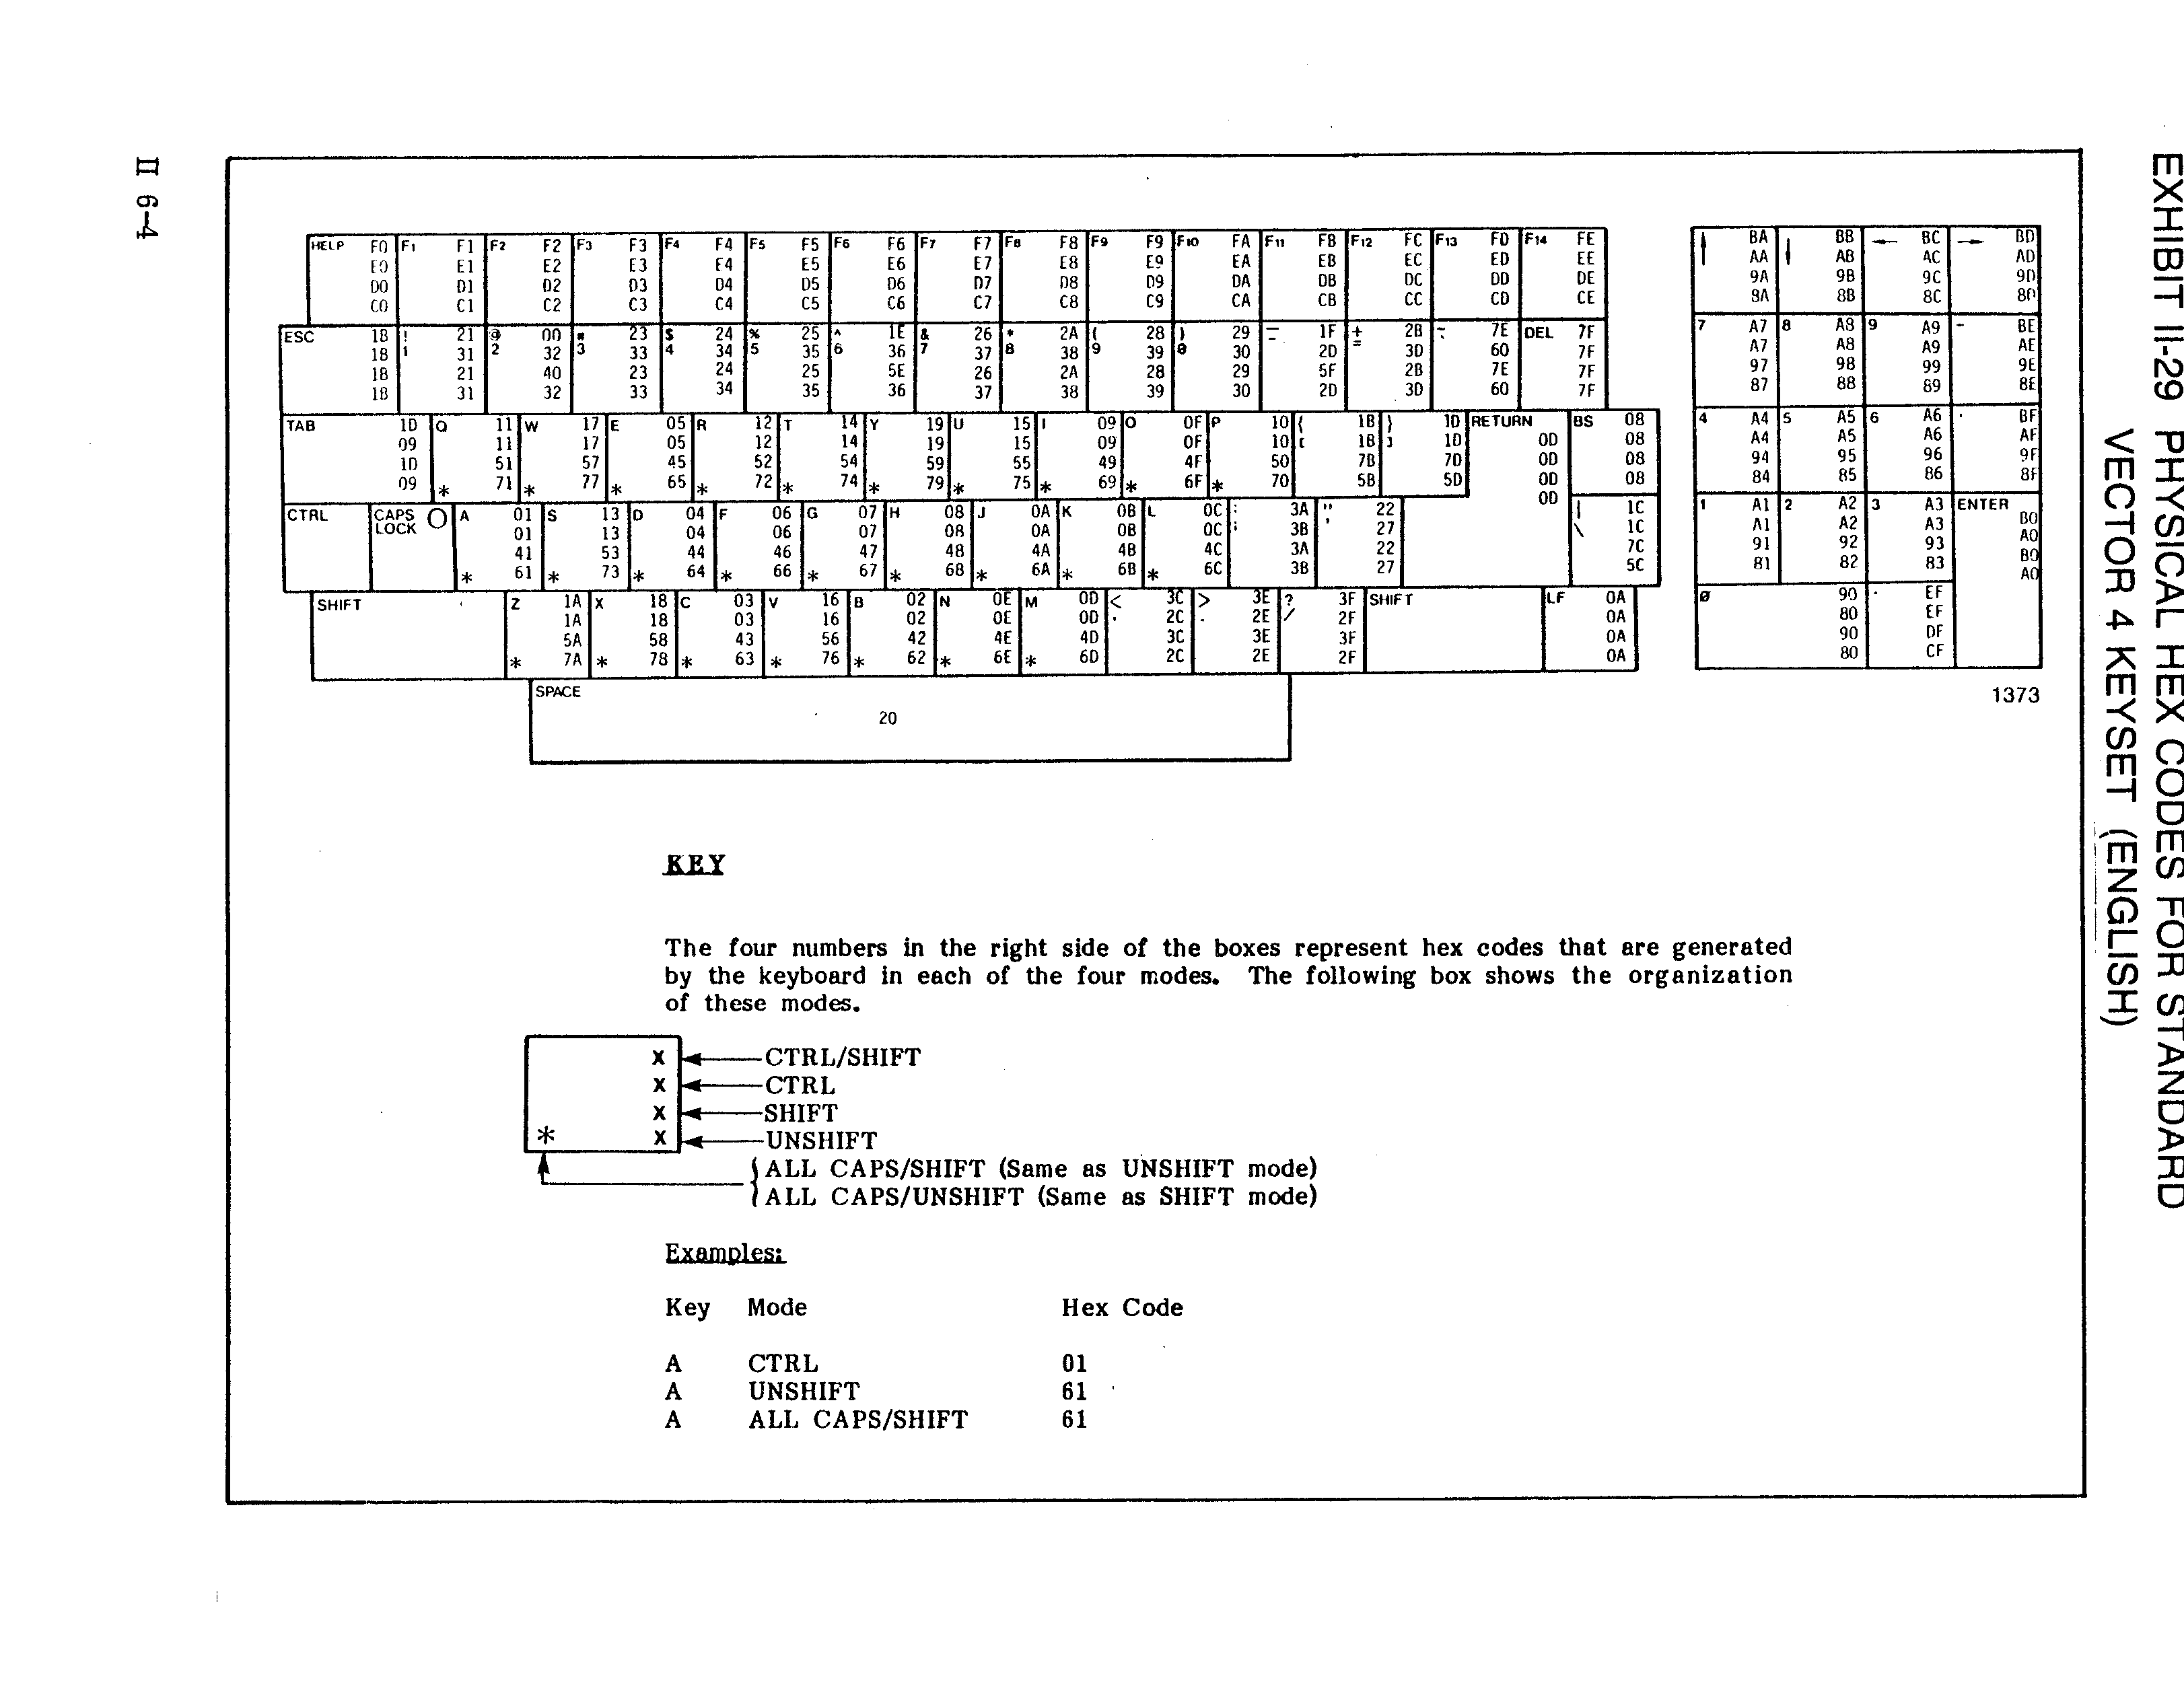
Testing shows it works with the Vector, so then I enhance it to behave more like the original keyboard. Since the last post, I have now obtained the Vector 4 Technical Information (P/N 7200-0001) which provides all the keycodes. I also get rid of the blinking LED and have the LED signal key presses instead. At some point I’ll need to implement auto-repeat when holding down a key, but the patch is already usable.